IDEA + Spring Boot + JRebel 热部署不能自动编译的解决方案和启动的几种方式
自动编译
修改文件后,焦点离开 IDEA 后,任务栏会有进度提示。
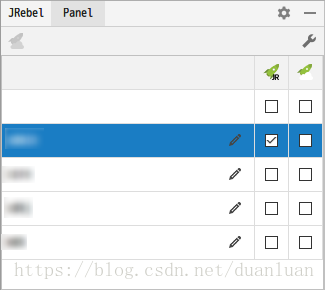
- 启用 Module 的 JRebel 自动编译:打开 IDEA 左侧 Sidebar 中的 JRebel Panel(View -> Tool Windows -> JRebel),然后勾选需要的 Module。
Jrebel 插件会自动在 resources 目录底下生成一个 rebel.xml。
- 允许 IDEA 自动编译:在 Maintenance(Ctrl + Shift + Alt + /) -> Registry 中勾选 compiler.automake.allow.when.app.running,此时 IDEA 会自动选中 Settings -> Build, Execution, Deployment -> Compiler 中的 Build project automatically。
如果更改了 Project Structure 导致不能用 JRebel 启动或者启动后不能自动编译,在 Project Structure 不报错的情况下,删除 rebel.xml,重新勾选即可,如果还是没用,在 Project Structure 不报错的情况下,删除 .idea、.iml、rebel.xml 重新导入项目勾选即可。
方式一 Application 类
在 Run/Debug Configurations 中修改配置。

Application 类右键选择 Run/Debug with JRebel ‘Application’,或者工具栏运行等。
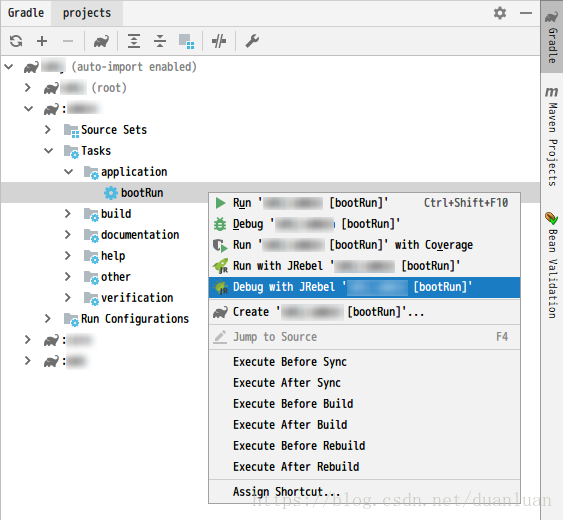
方式二 bootRun
Maven、Gradle 加载了 org.springframework.boot 插件后,在 Maven、Gradle window 中,找到 spring-boot:run(Module name -> Plugins -> spring-boot) 或者 bootRun(Module name -> Tasks -> application),右键选择 Run/Debug with JRebel ‘Module name’ [spring-boot:run/bootRun]。
- Maven
<build>
  <plugins>
    <plugin>
      <groupId>org.springframework.boot</groupId>
      <artifactId>spring-boot-maven-plugin</artifactId>
    </plugin>
  </plugins>
</build>
- Gradle - groovy
buildscript {
  ext {
    springBootVersion = "2.0.4.RELEASE"
  }

  dependencies {
    classpath "org.springframework.boot:spring-boot-gradle-plugin:${springBootVersion}"
  }
}

apply plugin: "org.springframework.boot"- Gradle - kts
plugins {
  id("org.springframework.boot") version "2.1.1.RELEASE"
}
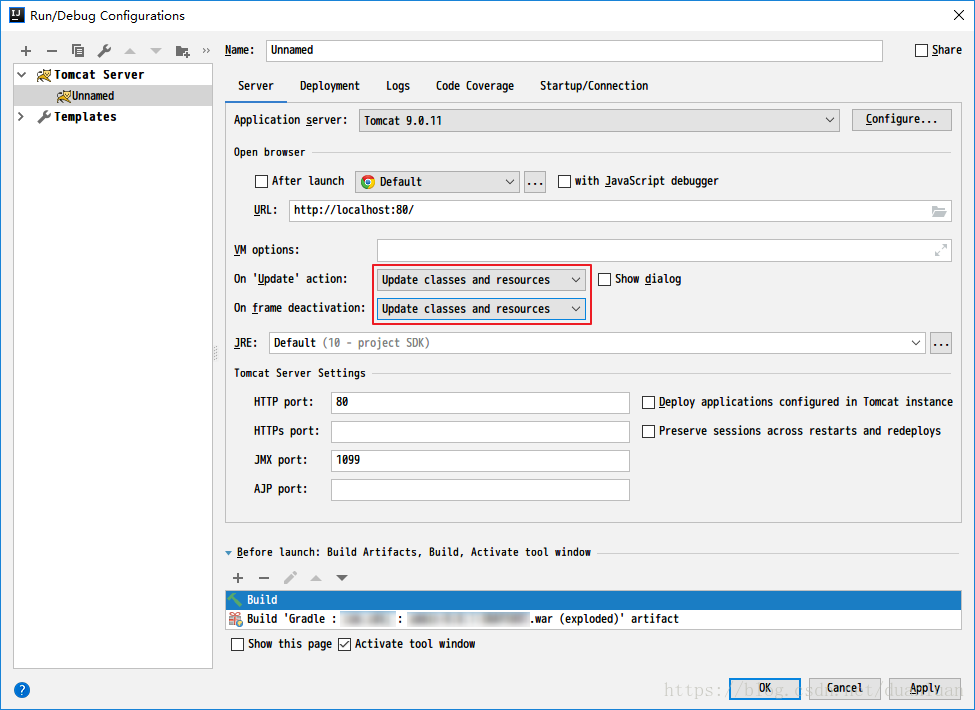
方式三 本地 Tomcat
使用本地 Tomcat 也可以自动编译,就像非 Spring Boot 项目一样,而且不需要启用 JRebel 自动编译和允许 IDEA 自动编译,还可以 Ctrl + F10 手动重新加载,但是此方式启动慢一丢丢。
- 新增启动类
import org.springframework.boot.SpringApplication;
import org.springframework.boot.builder.SpringApplicationBuilder;
import org.springframework.boot.web.servlet.support.SpringBootServletInitializer;

public class SpringBootInitializer extends SpringBootServletInitializer {

  @Override
  protected SpringApplicationBuilder configure(SpringApplicationBuilder builder) {
    return builder.sources(Application.class);
  }
}- 添加 war 插件:
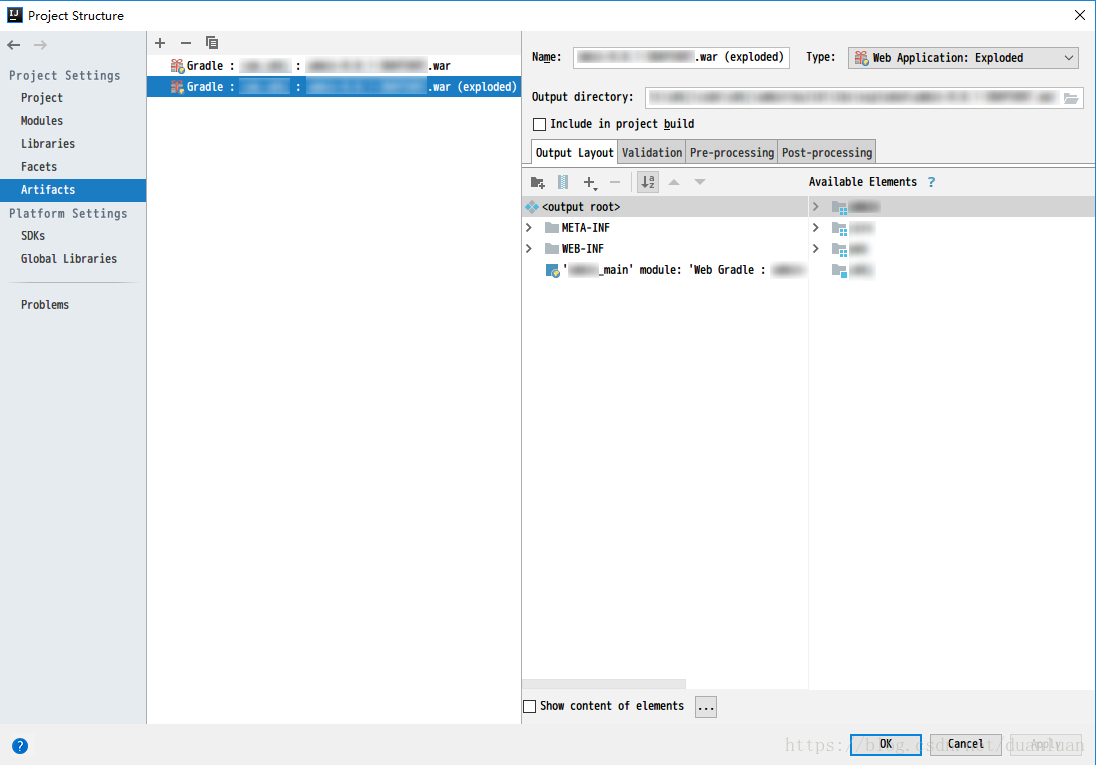
直接添加 Artifacts 的话,可能会有些文件没有打包进去导致报错。
- Maven
<packaging>war</packaging>
<dependency>
……
<groupId>org.springframework.boot</groupId>
<artifactId>spring-boot-starter-web</artifactId>
<!-- 移除内置 Tomcat -->
<exclusions>
  <exclusion>
    <groupId>org.springframework.boot</groupId>
    <artifactId>spring-boot-starter-tomcat</artifactId>
  </exclusion>
</exclusions>
……
</dependency>- Gradle - groovy
apply plugin: 'war'- Gradle - kts
plugins {
  war
}
apply(plugin = "war")
添加插件后会在 Project Structure -> Project Settings -> Artifacts 自动生成 Web Application: Archive。
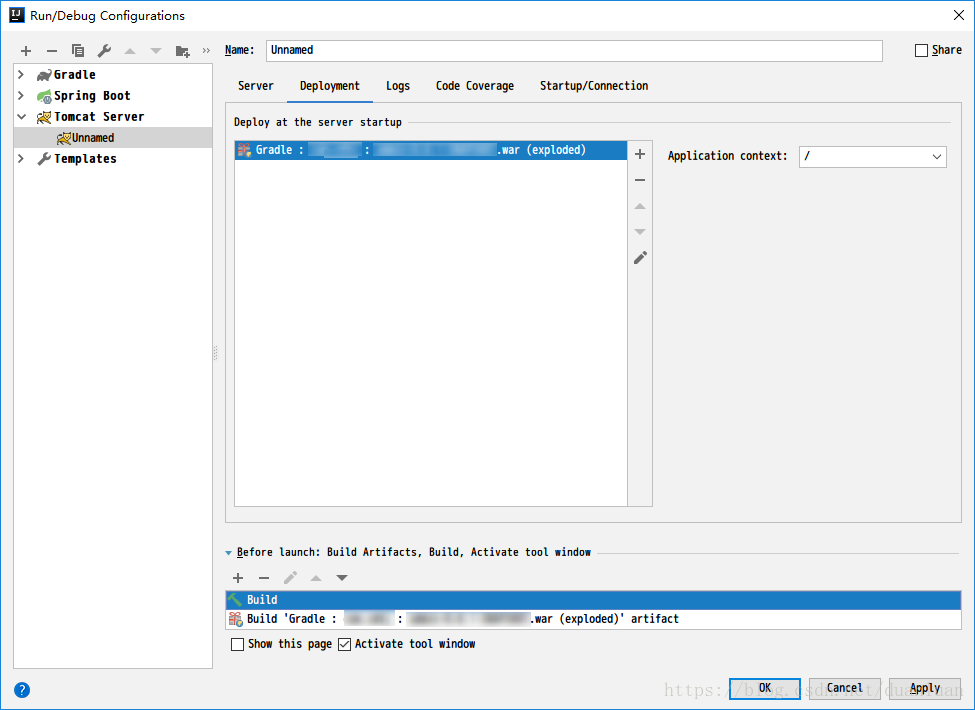
- 配置本地 Tomcat,工具栏使用 JRebel 启动即可:
参考资料:
把 spring-boot 项目部署到 tomcat 容器中
JRebel 免费激活使用
版权说明 : 本文为转载文章, 版权归原作者所有 版权申明
原文链接 : https://blog.csdn.net/duanluan/article/details/79080370
内容来源于网络,如有侵权,请联系作者删除!
