springboot配置多项目下统一切换不同环境变量profile办法
springboot配置多项目下统一切换不同环境变量profile办法
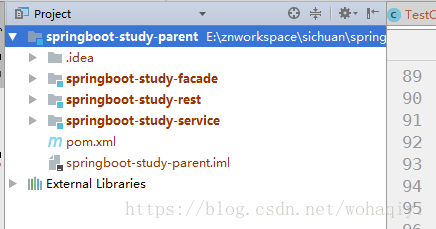
springboot 适合于微服务那种多项目开发,每一个小项目就是一个springboot 项目,比如我们这样:
问题发生:
我们知道springboot 项目中的配置文件application.properties ,几乎我们的配置信息都写在了这边,非常方便,但常常我们会多环境应用,比如开发环境 、测试环境 、正式环境 等不同的配置信息,前一段时间,对我们公司的一个项目,在多个省进行了部署,我改来改去差点疯了,同事的提醒,也深刻体会到,如果单用一个配置文件,绝对不行。
配置办法:
对于上边的贴出的那个例子,介绍如下:
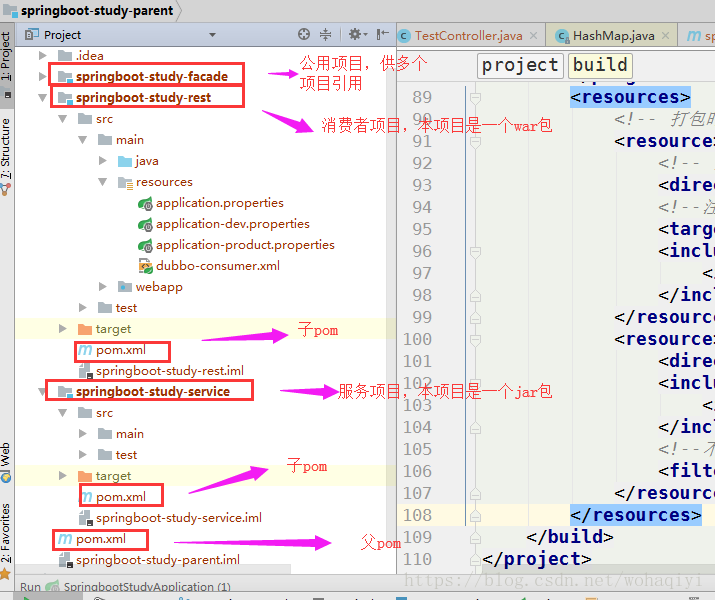
当然springboot 项目默认为jar ,但是有时候我们也会像上边一样,以war 包运行。针对于不同的包类型,我发现配置是不同的。
1、每一个子项目中创建dev 、product 等多个不同的配置文件
大家这里可能说是不是太麻烦,每个子项目都要配一个,其实是可以都配置到父pom.xml 里的,只不过我嫌看起来不直观,所以都每个环境都给搞了一个,后边我会写上直接一个配置文件搞定的写法。
如上图所示,在两个子项目springboot-study-rest 、springboot-study-service 中的resources 下,分别都创建application-dev.properties 和application-product.properties 两个文件。
然后在它们原有的application.properties 文件中都填写下边这种配置:
#多环境配置
spring.profiles.active=@activatedProperties@上边的activatedProperties 会在下边第二步 中提到。
然后对于dev 、product 的不同环境下的配置,分别写到对应的配置文件中即可。
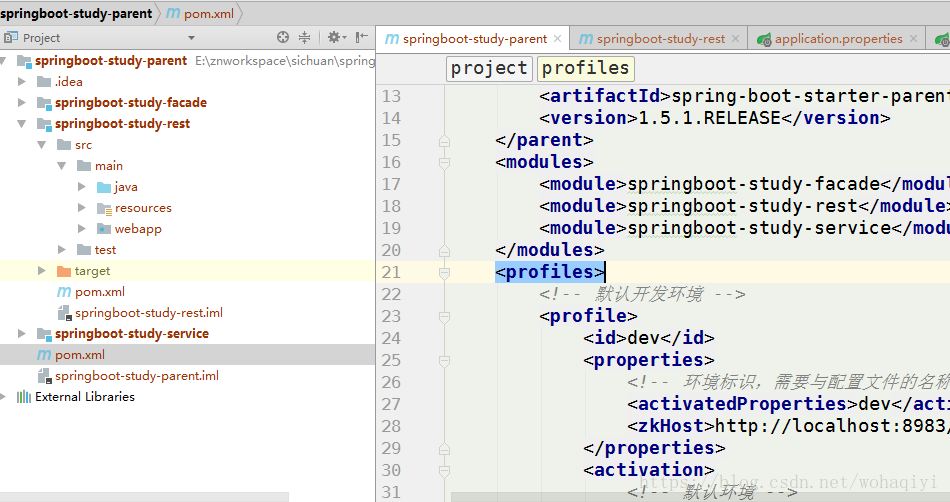
2、父pom 添加profiles
首先找到项目的父pom.xml ,如果你单项目,那就找它自己就行了,找到后,加上如下配置:
<profiles>
        <!-- 默认开发环境 -->
        <profile>
            <!--id唯一,不能有重复的-->
            <id>dev</id>
            <!--配置-->
            <properties>
                <!-- 环境标识,需要与配置文件的名称相对应 -->
                <activatedProperties>dev</activatedProperties>
            </properties>
            <activation>
                <!-- 默认环境,如果设置了这个,则项目运行默认 使用这个profile的配置 -->
                <activeByDefault>true</activeByDefault>
            </activation>
        </profile>
        <!-- 生产环境 -->
        <profile>
            <id>product</id>
            <properties>
                <activatedProperties>product</activatedProperties>
            </properties>
        </profile>
</profiles>上边中你会看到在第一步 中配置的那个activatedProperties,它们是一一对应的,并且两边添加上@@ 即可。
上边这段,我是放置在父pom.xml 的下边这个位置,位置无所谓的:
3、war 包的,子pom 添加resources 如下:
<build>
        <finalName>springboot-study-rest</finalName>
        <plugins>
            <plugin>
                <groupId>org.springframework.boot</groupId>
                <artifactId>spring-boot-maven-plugin</artifactId>
                <executions>
                    <execution>
                        <goals>
                            <goal>repackage</goal>
                        </goals>
                    </execution>
                </executions>
            </plugin>
            <plugin>
                <groupId>org.apache.maven.plugins</groupId>
                <artifactId>maven-war-plugin</artifactId>
                <configuration>
                    <failOnMissingWebXml>false</failOnMissingWebXml>
                </configuration>
            </plugin>
        </plugins>
        <resources>
            <!-- 打包时将jsp文件拷贝到META-INF目录下-->
            <resource>
                <!-- 指定resources插件处理哪个目录下的资源文件 -->
                <directory>src/main/webapp</directory>
                <!--注意此次必须要放在此目录下才能被访问到-->
                <targetPath>META-INF/resources</targetPath>
                <includes>
                    <include>**/**</include>
                </includes>
            </resource>
            <resource>
                <directory>src/main/resources</directory>
                <includes>
                    <include>**/**</include>
                </includes>
                <!--不加这个就会报错,对于多配置文件的这种,必须设成true-->
                <filtering>true</filtering>
            </resource>
        </resources>
</build>上边这段是我把整个pom.xml 里`` 标签中的东西贴上了,大家可以参照,这里只说resources ,注意下边有一个:
<filtering>true</filtering>一定要设置成true ,否则项目运行的时候,application.properties 文件中的引用变量值变不过来。
3、jar 包的,子pom 中不需要加resource:
我亲自试过,下边是我的jar包中,pom.xml 中的`` 标签内容:
<build>
        <plugins>
            <!--springboot项目打包必须要带的-->
            <plugin>
                <groupId>org.springframework.boot</groupId>
                <artifactId>spring-boot-maven-plugin</artifactId>
                <version>1.5.1.RELEASE</version>
                <executions>
                    <execution>
                        <goals>
                            <goal>repackage</goal>
                        </goals>
                    </execution>
                </executions>
            </plugin>
            <!--<plugin>-->
                <!--<groupId>org.apache.maven.plugins</groupId>-->
                <!--<artifactId>maven-compiler-plugin</artifactId>-->
                <!--<version>3.3</version>-->
                <!--<configuration>-->
                    <!--<source>1.8</source>-->
                    <!--<target>1.8</target>-->
                <!--</configuration>-->
            <!--</plugin>-->
            <!--<plugin>-->
                <!--<groupId>org.apache.maven.plugins</groupId>-->
                <!--<artifactId>maven-war-plugin</artifactId>-->
                <!--<version>2.6</version>-->
                <!--<configuration>-->
                    <!--<failOnMissingWebXml>false</failOnMissingWebXml>-->
                <!--</configuration>-->
            <!--</plugin>-->
        </plugins>
        <!--<resources>-->
            <!--<resource>-->
                <!--<directory>src/main/resources</directory>-->
                <!--<includes>-->
                    <!--<include>application.properties</include>-->
                <!--</includes>-->
                <!--<filtering>true</filtering>-->
            <!--</resource>-->
            <!--<resource>-->
                <!--<directory>src/main/resources</directory>-->
                <!--<includes>-->
                    <!--<include>**/*</include>-->
                <!--</includes>-->
            <!--</resource>-->
        <!--</resources>-->
</build>上边我已经把其他东西都注释掉了,只留下一个plugins 标签。编译之后,就可以替换成功。而war 包却不能那样,必须要有resources 标签,并且对其中的filter 设置成true才可以。
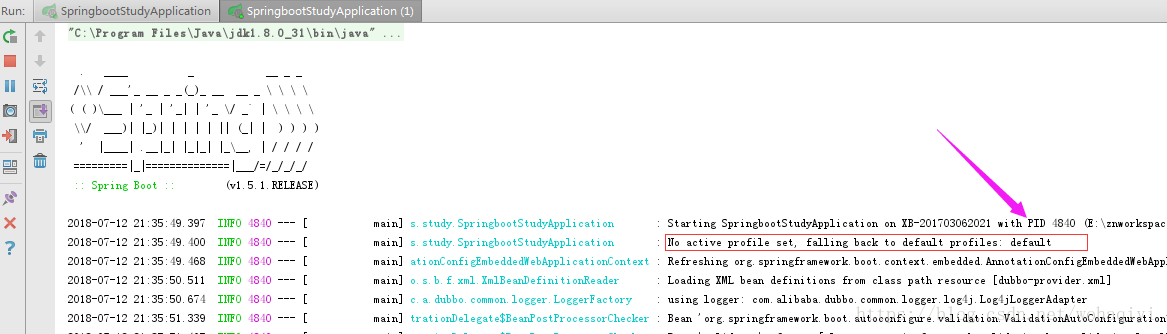
到此,可以直接运行项目,如果都出现下边这行,即配置完成。
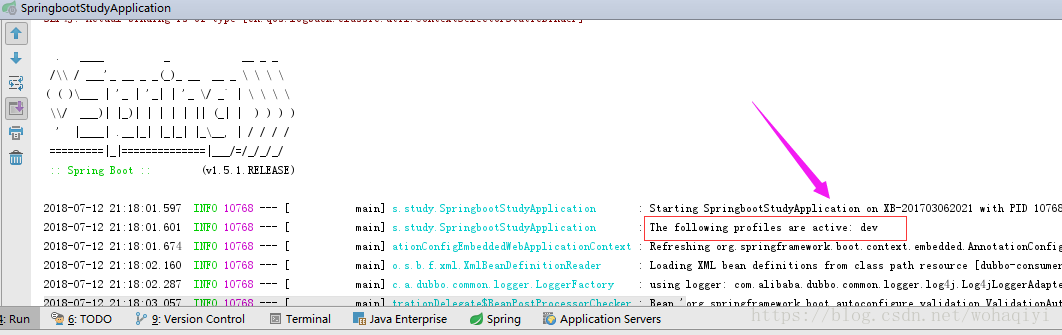
如果上图的位置中还是@activatedProperties@ 说明没有成功。
下边说一下一个配置文件搞定的办法
其实通过以上的配置,大家估计也看出来了,如何只使用一个配置文件,配置除去第一步 ,其他,跟上边是一样的,只不过需要把你对于不同环境的配置信息,都移到了父pom.xml 中即可。
1、配置信息写到父pom.xml中
<profiles>
        <!-- 默认开发环境 -->
        <profile>
            <!--id唯一,不能有重复的-->
            <id>dev</id>
            <!--配置-->
            <properties>
                <!-- 环境标识,需要与配置文件的名称相对应 -->
                 <restport>8076</restport>
                 <serviceport>8089</serviceport>
                <zkHost>http://localhost:8983/solr</zkHost>
                <driverclass>oracle.jdbc.driver.OracleDriver</driverclass>
            </properties>
            <activation>
                <!-- 默认环境,如果设置了这个,则项目运行默认 使用这个profile的配置 -->
                <activeByDefault>true</activeByDefault>
            </activation>
        </profile>
        <!-- 生产环境 -->
        <profile>
            <id>product</id>
            <properties>
                 <restport>30000</restport>
                 <serviceport>30001</serviceport>
                <zkHost>http://113.11.11.11:8983/solr</zkHost>
                <driverclass>com.microsoft.sqlserver.jdbc.SQLServerDriver</driverclass>
            </properties>
        </profile>
</profiles>即把我们的配置,都写到了每一个profiles下的properties 中了。
2、application.properties 文件引用
springboot-study-rest 项目中的application.properties 文件中如下:
server.port=@restport@
spring.data.solr.zk-host=@zkHost@springboot-study-service项目中的application.properties 文件中如下:
server.port=@serviceport@
spring.datasource.driver-class-name=@driverclass@
3、配置完成后,运行项目。
配置完成后,运行项目,因为现在没有了dev 、product 的properties 文件了,那运行后的日志会是这样的,即default ,没关系,意思就是说使用的是application.properties 文件中的内容。
4、其他配置参照上边那种配置方法即可
对于其他的关于各个项目的pom.xml 配置,就参照上边写的吧,都一样了。
这样看来,下边的这种配置方式更加简洁。可能大部分人会更偏向于接受后边的这种配置。
配置失败的原因分析
可能我写的不够详细,大家在配置中会遇到失败的问题,我觉得最可能引起错误的原因主要有下边这几个:
1、maven 的配置没有更新,因为我们改了些配置,即需要重新更新下maven 配置即可。
2、项目未编译 ,如果你配置正确,还没有启动成功,十之八九的原因在这里,你只需要对项目重新clean install 即可。即把旧的class文件及配置全部清除掉,再重新编译打包即可。
3、配置对应的名称写错,不对应 ,即类似于我们在properties 文件中的引用,@@ 之间的内容必须与profile 中的properties 标签中的名字对应,如果错了就替换不成功的,如果没有那肯定也是替换不了的。
4、war 包中的resources 下的filter 未设置成true 。
版权说明 : 本文为转载文章, 版权归原作者所有 版权申明
原文链接 : https://blog.csdn.net/qq_43842093/article/details/121590887
内容来源于网络,如有侵权,请联系作者删除!
