Spring @PropertySource注解示例
在Spring中,你可以使用@PropertySource注解来将你的配置外化为一个属性文件。在这篇文章中,我们将讨论如何使用@PropertySource来读取属性文件,并用@Value和Environment来显示其值。
@PropertySource注解为添加e1d5d1到Spring的环境提供了一个方便的声明性机制。要与@Configuration类一起使用。
Spring @PropertySource注解的简单例子
在这个例子中,我们从config.properties文件中读取数据库配置,并使用Environment将这些属性值设定为DataSourceConfig class。
import org.springframework.beans.factory.InitializingBean;
import org.springframework.beans.factory.annotation.Autowired;
import org.springframework.context.annotation.Configuration;
import org.springframework.context.annotation.PropertySource;
import org.springframework.core.env.Environment;

@Configuration
@PropertySource("classpath:config.properties")
public class ProperySourceDemo implements InitializingBean {

    @Autowired
    Environment env;

    @Override
    public void afterPropertiesSet() throws Exception {
        setDatabaseConfig();
    }

    private void setDatabaseConfig() {
        DataSourceConfig config = new DataSourceConfig();
        config.setDriver(env.getProperty("jdbc.driver"));
        config.setUrl(env.getProperty("jdbc.url"));
        config.setUsername(env.getProperty("jdbc.username"));
        config.setPassword(env.getProperty("jdbc.password"));
        System.out.println(config.toString());
    }
}
Spring @PropertySource注解占位符示例
任何存在于@PropertySource资源位置的${...}占位符都将根据已经针对该环境注册的属性源集合进行解析。
例如。
import org.springframework.beans.factory.InitializingBean;
import org.springframework.beans.factory.annotation.Autowired;
import org.springframework.context.annotation.Configuration;
import org.springframework.context.annotation.PropertySource;
import org.springframework.core.env.Environment;

@Configuration
@PropertySource("classpath:/com/${my.placeholder:default/path}/config.properties")
public class ProperySourceDemo implements InitializingBean {

    @Autowired
    Environment env;

    @Override
    public void afterPropertiesSet() throws Exception {
        setDatabaseConfig();
    }

    private void setDatabaseConfig() {
       DataSourceConfig config = new DataSourceConfig();
       config.setDriver(env.getProperty("jdbc.driver"));
       config.setUrl(env.getProperty("jdbc.url"));
       config.setUsername(env.getProperty("jdbc.username"));
       config.setPassword(env.getProperty("jdbc.password"));
       System.out.println(config.toString());
    }
}
假设 "my.placeholder "存在于一个已经注册的属性源中,例如系统属性或环境变量,该占位符将被解析为相应的值。如果没有,那么 "default/path "将被作为默认值使用。如果没有指定默认值,并且一个属性不能被解析,那么就会抛出一个IllegalArgumentExceptionwil。
@PropertySources 注解 - 包括多个属性文件
引入了新的@PropertySources,以支持Java 8和一个更好的方法来包括多个属性文件。
@Configuration
 @PropertySources({
  @PropertySource("classpath:config.properties"),
  @PropertySource("classpath:db.properties")
 })
 public class AppConfig {
  //...
 }
允许 @PropertySource 忽略未找到的属性文件。
@Configuration
 @PropertySource("classpath:missing.properties")
 public class AppConfig {
  //...
}如果没有找到missing.properties,系统无法启动并抛出FileNotFoundException
Caused by: java.io.FileNotFoundException:
  classpath resource [missiong.properties] cannot be opened because it does not exist
在Spring 4中,你可以使用e1d15d1来忽略未找到的属性文件
@Configuration
 @PropertySource(value="classpath:missing.properties", ignoreResourceNotFound=true)
 public class AppConfig {
  //...
 }

        @PropertySources({
  @PropertySource(value = "classpath:missing.properties", ignoreResourceNotFound=true),
  @PropertySource("classpath:config.properties")
        })
Spring @PropertySource注解完整示例
让我们创建一个简单的Spring boot maven项目来快速启动。
在这个例子中,我们从文件config.properties文件中读取数据库配置,并将这些属性值设置为DataSourceConfigclass。
使用Spring Initializr在http://start.spring.io/创建一个maven项目,这是一个在线Spring Boot应用程序生成器。
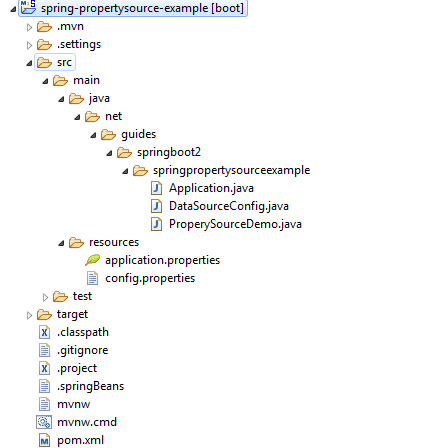
按照上图创建一个打包结构。
pom.xml文件
<?xmlversion="1.0"encoding="UTF-8"?>
<project xmlns="http://maven.apache.org/POM/4.0.0" xmlns:xsi="http://www.w3.org/2001/XMLSchema-instance"
 xsi:schemaLocation="http://maven.apache.org/POM/4.0.0 http://maven.apache.org/xsd/maven-4.0.0.xsd">
 <modelVersion>4.0.0</modelVersion>

 <groupId>net.guides.springboot2</groupId>
 <artifactId>spring-propertysource-example</artifactId>
 <version>0.0.1-SNAPSHOT</version>
 <packaging>jar</packaging>

 <name>spring-propertysource-example</name>
 <description>Demo project for Spring Boot</description>

 <parent>
  <groupId>org.springframework.boot</groupId>
  <artifactId>spring-boot-starter-parent</artifactId>
  <version>2.0.5.RELEASE</version>
  <relativePath/> <!-- lookup parent from repository -->
 </parent>

 <properties>
  <project.build.sourceEncoding>UTF-8</project.build.sourceEncoding>
  <project.reporting.outputEncoding>UTF-8</project.reporting.outputEncoding>
  <java.version>1.8</java.version>
 </properties>

 <dependencies>
  <dependency>
   <groupId>org.springframework.boot</groupId>
   <artifactId>spring-boot-starter</artifactId>
  </dependency>

  <dependency>
   <groupId>org.springframework.boot</groupId>
   <artifactId>spring-boot-starter-test</artifactId>
   <scope>test</scope>
  </dependency>
 </dependencies>

 <build>
  <plugins>
   <plugin>
    <groupId>org.springframework.boot</groupId>
    <artifactId>spring-boot-maven-plugin</artifactId>
   </plugin>
  </plugins>
 </build>
</project>
创建一个config.properties文件
让我们在classpath中创建一个config.properties文件,我们将使用@PropertySource注解来读取一个属性文件,并用@Value和Environment.
jdbc.driver=com.mysql.jdbc.Driver
jdbc.url=jdbc:mysql://localhost:3306/dev_db
jdbc.username=root
jdbc.password=root
来显示值。
创建DataSourceConfig.java文件
package net.guides.springboot2.springpropertysourceexample;

public class DataSourceConfig {
 private String driver;
 private String url;
 private String username;
 private String password;

 @Override
 public String toString()
 {
  return "DataSourceConfig [driver=" + driver + ", url=" + url + ", username=" + username + "]";
 }
 public String getDriver()
 {
  return driver;
 }
 public void setDriver(String driver)
 {
  this.driver = driver;
 }
 public String getUrl()
 {
  return url;
 }
 public void setUrl(String url)
 {
  this.url = url;
 }
 public String getUsername()
 {
  return username;
 }
 public void setUsername(String username)
 {
  this.username = username;
 }
 public String getPassword()
 {
  return password;
 }
 public void setPassword(String password)
 {
  this.password = password;
 }
}
创建 ProperySourceDemo.java 文件
package net.guides.springboot2.springpropertysourceexample;

import org.slf4j.Logger;
import org.slf4j.LoggerFactory;
import org.springframework.beans.factory.InitializingBean;
import org.springframework.beans.factory.annotation.Autowired;
import org.springframework.beans.factory.annotation.Value;
import org.springframework.context.annotation.Configuration;
import org.springframework.context.annotation.PropertySource;
import org.springframework.core.env.Environment;

@Configuration
@PropertySource("classpath:config.properties")
public class ProperySourceDemo implements InitializingBean {

 private static final Logger LOGGER = LoggerFactory.getLogger(ProperySourceDemo.class);

 @Value("${jdbc.driver}")
 private String driver;

 @Value("${jdbc.url}")
 private String url;

 @Value("${jdbc.username}")
 private String username;

 @Value("${jdbc.password}")
 private String password;

 @Autowired
 Environment env;

 @Override
 public void afterPropertiesSet() throws Exception {
  LOGGER.info(driver);
  LOGGER.info(url);
  LOGGER.info(password);
  LOGGER.info(username);
  setDatabaseConfig();
 }

 private void setDatabaseConfig() {
  DataSourceConfig config = new DataSourceConfig();
  config.setDriver(env.getProperty("jdbc.driver"));
  config.setUrl(env.getProperty("jdbc.url"));
  config.setUsername(env.getProperty("jdbc.username"));
  config.setPassword(env.getProperty("jdbc.password"));
  System.out.println(config.toString());
 }
}
The Application.java File
这个spring boot应用程序有一个名为Application.java的入口点Java类,其中有一个公共静态void main(String[] args)方法,你可以运行它来启动应用程序。
package net.guides.springboot2.springpropertysourceexample;

import org.springframework.boot.SpringApplication;
import org.springframework.boot.autoconfigure.SpringBootApplication;

@SpringBootApplication
public class Application {

 public static void main(String[] args) {
  SpringApplication.run(Application.class, args);
 }
}
@SpringBootApplication是一个方便的注解,添加了以下所有内容。
@Configuration 将该类标记为应用程序上下文的Bean定义的来源。
@EnableAutoConfiguration告诉Spring Boot开始根据classpath设置、其他bean和各种属性设置来添加bean。
通常你会为Spring MVC应用添加@EnableWebMvc,但Spring Boot在classpath上看到spring-webmvc时就会自动添加它。这标志着该应用是一个Web应用,并激活了关键行为,如设置DispatcherServlet。@ComponentScan告诉Spring去寻找hello包中的其他组件、配置和服务,从而使它能够找到控制器。
让我们运行Application.java类并观察控制台的输出。
输出

版权说明 : 本文为转载文章, 版权归原作者所有 版权申明
原文链接 : https://www.javaguides.net/2018/09/spring-propertysource-annotation-with-example.html
内容来源于网络,如有侵权,请联系作者删除!
