Spring Boot微服务-Spring Cloud API网关
在本教程中,我们将学习如何使用SpringCloudGateway库在我们的微服务项目中设置API网关。
Spring Cloud网关概述
Spring Cloud Gateway提供了一个库,用于在Spring WebFlux之上构建API网关。Spring Cloud Gateway旨在提供一种简单而有效的方法来路由到API,并为API提供横切关注点,如安全性、监控/度量和弹性。
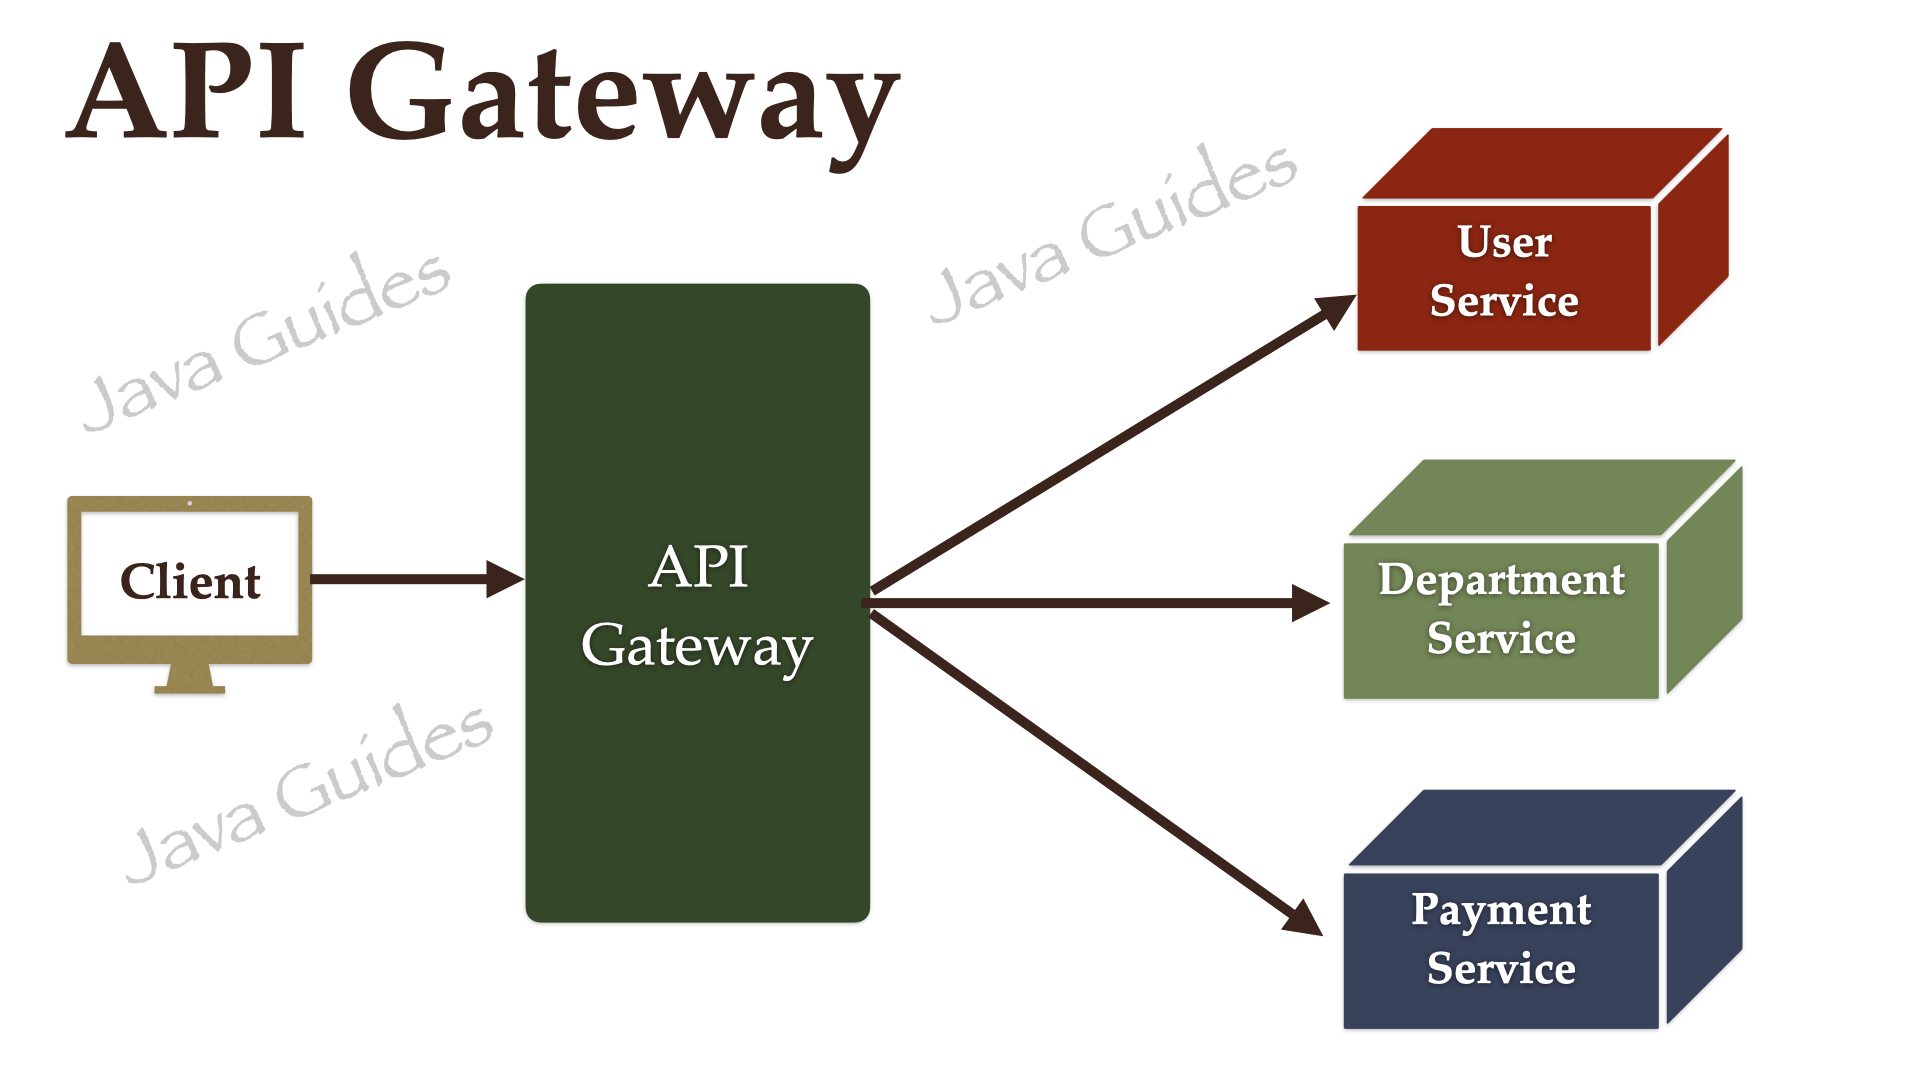
Spring Cloud Gateway有三个重要部分:
路线− 这些是网关的构建块,其中包含请求要转发到的URL以及应用于传入请求的谓词和筛选器
谓词− 这些是一组标准,应该与要转发到内部微服务的传入请求相匹配。例如,只有当传入URL包含该路径时,路径谓词才会转发请求
过滤器− 在将请求发送到内部微服务或在响应客户端之前,这些服务充当您可以修改传入请求的位置。
要了解更多信息,请阅读Spring Cloud Gateway documentation。
先决条件
请参阅以下教程以创建部门服务和用户服务微服务,并配置Netflix Eureka service Registry:
Spring Boot微服务-基于Spring Cloud Netflix Eureka的服务注册表
1.在IntelliJ IDEA中创建和设置Spring Boot项目
让我们使用spring initializr创建一个Spring引导项目。
使用spring initializr创建spring boot应用程序时,请参阅以下屏幕截图以输入详细信息:

单击Generate按钮以zip文件的形式下载Spring引导项目。解压缩zip文件并在IntelliJIDEA中导入Spring引导项目。
这是彩球。供您参考的xml文件:
<?xml version="1.0" encoding="UTF-8"?>
<project xmlns="http://maven.apache.org/POM/4.0.0" xmlns:xsi="http://www.w3.org/2001/XMLSchema-instance"
	xsi:schemaLocation="http://maven.apache.org/POM/4.0.0 https://maven.apache.org/xsd/maven-4.0.0.xsd">
	<modelVersion>4.0.0</modelVersion>
	<parent>
		<groupId>org.springframework.boot</groupId>
		<artifactId>spring-boot-starter-parent</artifactId>
		<version>2.7.4</version>
		<relativePath/> <!-- lookup parent from repository -->
	</parent>
	<groupId>nt.javaguides</groupId>
	<artifactId>api-gateway</artifactId>
	<version>0.0.1-SNAPSHOT</version>
	<name>api-gateway</name>
	<description>api-gateway</description>
	<properties>
		<java.version>17</java.version>
		<spring-cloud.version>2021.0.4</spring-cloud.version>
	</properties>
	<dependencies>
		<dependency>
			<groupId>org.springframework.boot</groupId>
			<artifactId>spring-boot-starter-actuator</artifactId>
		</dependency>
		<dependency>
			<groupId>org.springframework.cloud</groupId>
			<artifactId>spring-cloud-starter-gateway</artifactId>
		</dependency>
		<dependency>
			<groupId>org.springframework.cloud</groupId>
			<artifactId>spring-cloud-starter-netflix-eureka-client</artifactId>
		</dependency>

		<dependency>
			<groupId>org.springframework.boot</groupId>
			<artifactId>spring-boot-starter-test</artifactId>
			<scope>test</scope>
		</dependency>
	</dependencies>
	<dependencyManagement>
		<dependencies>
			<dependency>
				<groupId>org.springframework.cloud</groupId>
				<artifactId>spring-cloud-dependencies</artifactId>
				<version>${spring-cloud.version}</version>
				<type>pom</type>
				<scope>import</scope>
			</dependency>
		</dependencies>
	</dependencyManagement>

	<build>
		<plugins>
			<plugin>
				<groupId>org.springframework.boot</groupId>
				<artifactId>spring-boot-maven-plugin</artifactId>
			</plugin>
		</plugins>
	</build>

</project>
现在我们有了API网关应用程序中需要的所有依赖项。现在,让我们配置Routes和其他特定于API网关的配置,以便在我们的项目中使用
2.使用@EnableEurekaClient启用Eureka客户端
@EnableEurekaClient注解使Spring Boot应用程序充当Eureka客户端。
package nt.javaguides.apigateway;

import org.springframework.boot.SpringApplication;
import org.springframework.boot.autoconfigure.SpringBootApplication;
import org.springframework.cloud.netflix.eureka.EnableEurekaClient;

@SpringBootApplication
@EnableEurekaClient
public class ApiGatewayApplication {

	public static void main(String[] args) {
		SpringApplication.run(ApiGatewayApplication.class, args);
	}

}
不要错过这一步,您必须将API网关配置为该项目的Eureka客户端。否则,您无法使用发现功能从服务注册表中识别正确的API。
3.配置Eureka服务器URL
要将Spring Boot应用程序注册到Eureka Server,我们需要在application.properties文件中添加以下配置,并在配置中指定Eureka服务器URL。
spring.application.name=API-GATEWAY
server.port=9191
eureka.instance.client.serviceUrl.defaultZone=http://localhost:8761/eureka/
management.endpoints.web.exposure.include=*
4.使用Spring Cloud Gateway配置API网关路由
现在,您可能想知道API网关如何正确地知道微服务的主机名或IP和端口。
当客户端向API网关发送请求时,它将使用服务注册表来通信和路由请求,从而发现正确的服务IP和PORT。
让我们使用属性配置路由:
spring.application.name=API-GATEWAY
server.port=9191
eureka.instance.client.serviceUrl.defaultZone=http://localhost:8761/eureka/
management.endpoints.web.exposure.include=*

spring.cloud.gateway.routes[0].id=USER-SERVICE
spring.cloud.gateway.routes[0].uri=lb://USER-SERVICE
spring.cloud.gateway.routes[0].predicates[0]=Path=/api/users/**

spring.cloud.gateway.routes[1].id=DEPARTMENT-SERVICE
spring.cloud.gateway.routes[1].uri=lb://DEPARTMENT-SERVICE
spring.cloud.gateway.routes[1].predicates[0]=Path=/api/departments/**

spring.cloud.gateway.routes[2].id=DEPARTMENT-SERVICE
spring.cloud.gateway.routes[2].uri=lb://DEPARTMENT-SERVICE
spring.cloud.gateway.routes[2].predicates[0]=Path=/message/**
我们为API网关路由设置了哪些属性?
- id–这只是路线的标识
- URI–这里我们可以使用URL http://localhost:8080或lb://DEPARTMENT-SERVICE。但是,如果我们需要在Netflix Eureka服务器上使用内置负载平衡器,我们应该使用lb://DEPARTMENT-SERVICE,然后API注册表将接管请求并向API网关显示负载平衡的请求目的地。
- 谓词–在这里,我们可以设置多个路径来标识正确的路由目的地。例如:如果API网关获取和请求类似于http://localhost:9191/api/users/1,那么它将被路由到http://localhost:8081/api/users/1。
5.运行所有微服务
港口运行的部门服务:http://localhost:8080'
端口上运行的用户服务:http://localhost:8081
端口上运行的API网关服务:http://localhost:9191
端口上运行的Service Registry服务:http://localhost:8761
6.验证Service Registry中的注册实例
转到浏览器并在新选项卡中点击此链接:http://localhost:8761

7.使用Postman客户端测试API网关
获取部门REST API:
请注意,我们使用API网关服务端口(9191)来调用部门服务API(端口8080)
港口运行的部门服务:http://localhost:8080
API网关服务在端口上运行:http://localhost:9191
API网关将请求从http://localhost:9191/api/departments/1路由到http://localhost:8080/api/departments/1

获取用户REST API:
注意,我们使用API网关服务端口(9191)来调用用户服务API端口(8081)。
端口上运行的用户服务:http://localhost:8081
端口上运行的API网关服务:http://localhost:9191
API网关将请求从http://localhost:9191/api/users/1路由到http://localhost:8081/api/users/1

8.结论
在本教程中,我们学习了如何使用Spring C在我们的微服务项目中设置API网关
版权说明 : 本文为转载文章, 版权归原作者所有 版权申明
原文链接 : https://www.javaguides.net/2022/10/spring-boot-microservices-spring-cloud-api-gateway.html
内容来源于网络,如有侵权,请联系作者删除!
